
White balance settings are something new to the digital photography era, but color temperature is not. In this article, you’ll learn a few things about White Balance, color temperature, and how to adjust this camera setting to make better images.
Light is made up of different colors
Full-spectrum light is composed of different ranges of color tones. You can see this by shining a bright light through a prism as seen below. The prism splits the light apart into different colors so you can see each of them individually. That same thing happens when it rains and you see a rainbow.
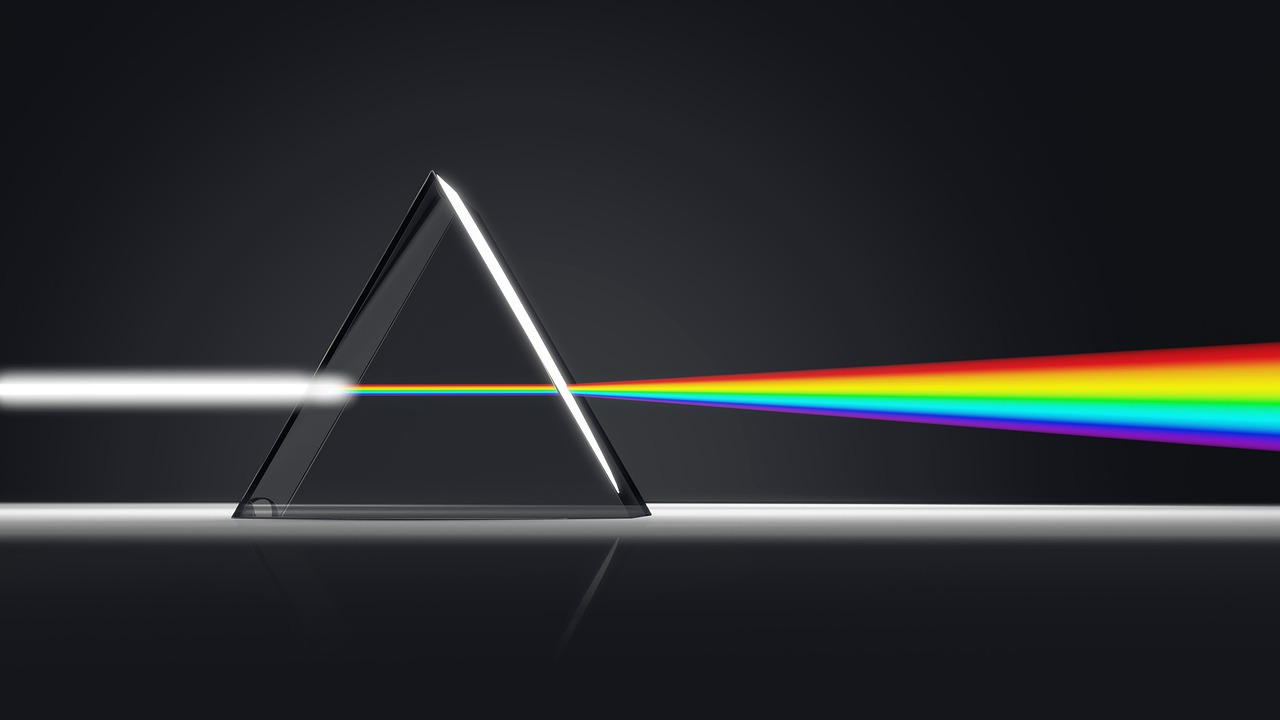
These colors are always there, they are normally just combined into the full visible light spectrum and our eyes see it as white or color neutral.
Your eyes naturally adjust for brightness changes in your environment such as when you go from a bright area to a dark one. The human body is a sophisticated device and your eyes make those adjustments in seconds so you barely notice any change in the scene. The same happens with the color of light.
Your camera however DOES see the color so you have to adjust the right settings to account for different lighting conditions so the scene is captured accurately or as a neutral color tone. This is where the White Balance setting comes into play.
Color Temperature
The range of different colors of light is generally referred to as the color temperature. As in Fahrenheit and Centigrade, it is represented by a scale in degrees, in this case, it’s called degrees Kelvin.
You may have noticed a funny White Balance option or setting on your camera called “K”. I’ll come back to that a bit later, but that’s what it represents, degrees Kelvin.
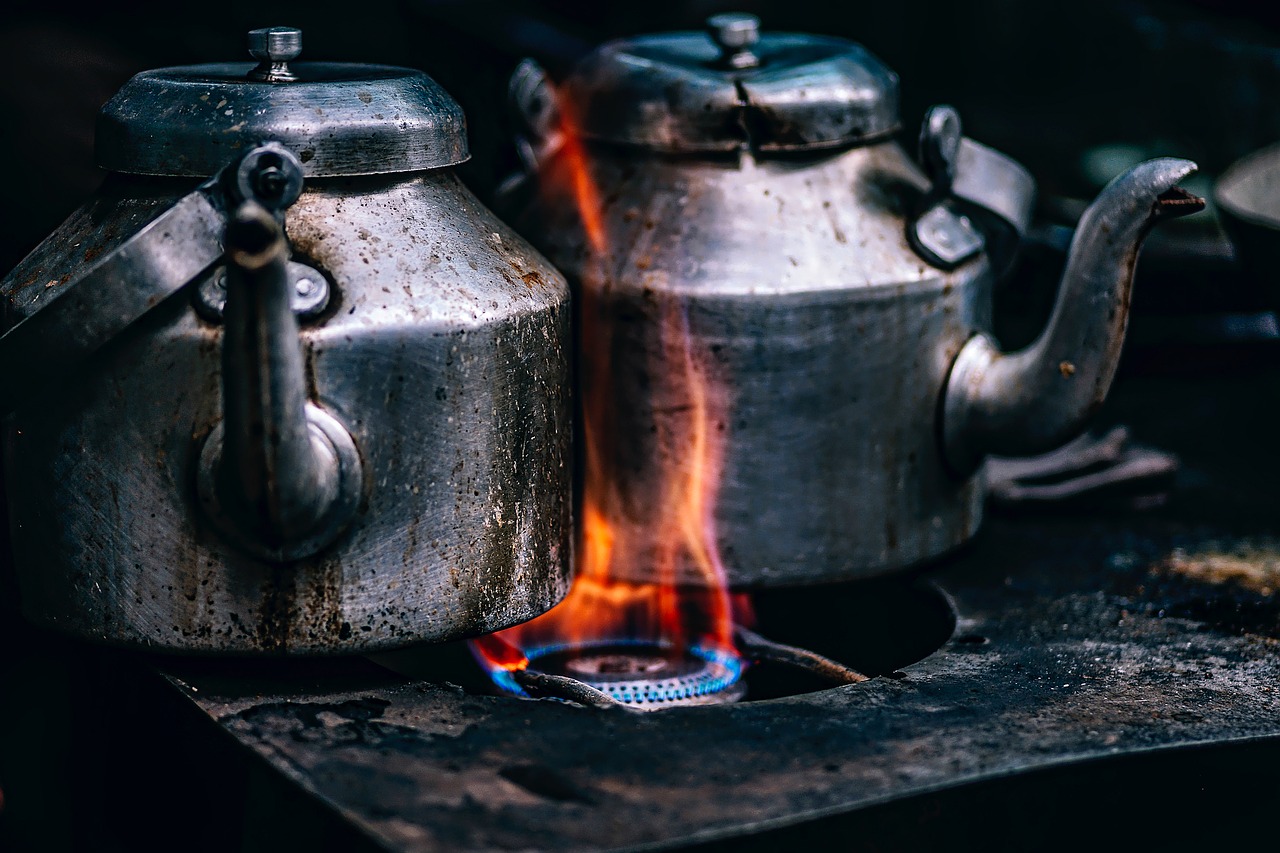
Kelvin numbers are derived from heating a blackbody radiator, think of it as a cast iron pot, until it glows. Just like a flame, the red and orange tones actually represent lower temperatures, and the hotter the flame or pot gets the bluer it gets.
In the image above, the hottest part of the flame (high degrees) is the blue area. Likewise on the color temperature scale. So at the bottom of the Kelvin scale is red, and blue is at the top. It looks like this:
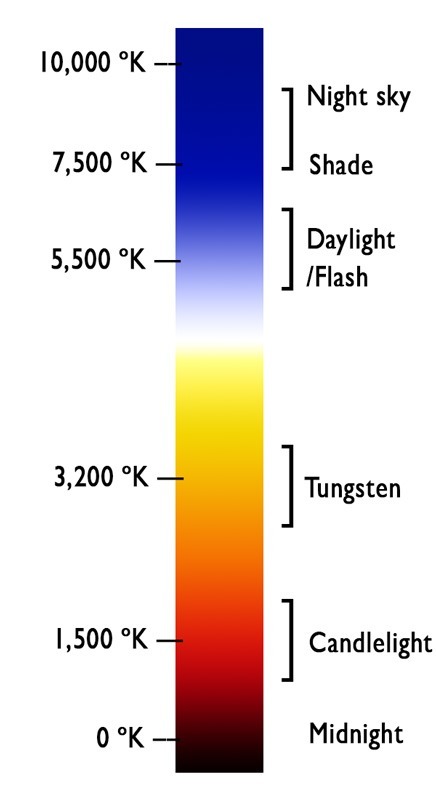
Kelvin temperature scale
How to set the White Balance on your camera
You will notice that there is no color temperature setting anywhere on your camera, what you need to look for instead is White Balance. Your camera will likely have several presets to select the color temperature for each situation you encounter.
The White Balance options usually include some of all of the following:
- Auto or AWB (auto White Balance)
- Shade
- Cloudy
- Incandescent or Tungsten (light bulb)
- Fluorescent
- Daylight (or direct sunlight)
- Flash
- Custom
- K or Kelvin
Auto White Balance (AWB) will assess the scene and the camera will set the color for you. This usually produces an acceptable image but selecting the right option for your situation may result in a nicer, more pleasing color to your images.
While you can look in your menu to find the White Balance setting, there is likely a shortcut or one-touch button somewhere on your camera. Or you can use the Quick Menu. Check the manual to see where to find the settings or how to use the Quick Menu to do things faster.
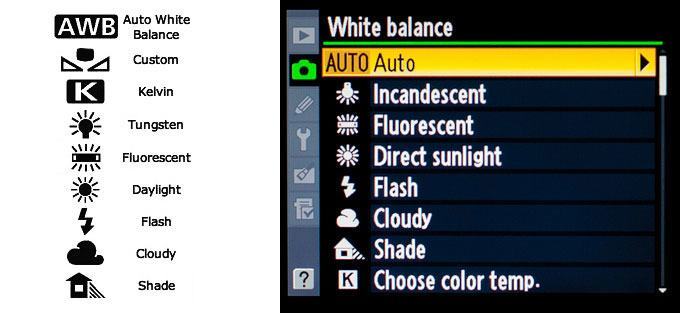
Once you’ve found the options, choose the one that best represents your scene. As per the color scale above you’ll see similar options represented by funny little icons as shown below.
Your camera may display them slightly differently – again consult your user manual if you aren’t sure.
Getting off AWB
As with most photography-related things, I encourage you to move away from using mostly automatic settings (which let the camera choose the options) to ones where you are making the choices. Ultimately it’s about control over the look of your final images. If you’re a recovering control freak like me, you’ll want to have as much control as possible, so learning the options and what they do will allow you to take control.
What the White Balance Preset options above are filtering out or neutralizing the color of light present in your scene. So if the camera sees blue light, it will apply a yellow filter to neutralize it.

NOTE: More on this below, but this is why your sunset images don’t look as colorful and vibrant as you remember them.
For example, the following image was taken at a Medieval festival. The suit of armor is silver/grey so you know it should be a neutral color which makes it a good white balance test.
Look at what happened when I shot the scene at all the various different White Balance presets.


Can you see what the camera is doing now? It’s adding a blue filter to counter the orange light that comes from regular household tungsten bulbs.
Look at the Kelvin scale above to see where Tungsten falls. It’s at the bottom of the scale in the orange/yellow range. So when you set it to the Tungsten preset – the camera is adding the opposite color (blue) to neutralize it.

In the image above the Shade White Balance setting is now counteracting lighting conditions of shooting in the shade. Where do you find shade on the color temperature scale? It’s in the blue range. The opposite of blue is yellow, so that’s what the camera applies when you choose Shade as the preset.

Above you see Fluorescent White Balance, which is also pretty close to the type of lighting in the actual scene when I took the image. Note: the color also depends on the type of bulb, as fluorescent bulbs come in many varieties and colors. I found that one to be pretty good so this is the setting I used to take the image.
When to use Auto (AWB) or Custom White Balance
There are three instances when I’d suggest using Auto White Balance.
#1 – Mixed lighting
If you have mixed light sources in the scene, such as tungsten light inside and daylight coming in a window – then select AWB (auto white balance) and it will do a pretty good job of balancing them.
You can also choose to set a custom color. A short description of how to set a Custom White Balance is as follows.
Take a photo of something neutral (a white piece of paper or a grey card) and tell the camera “use this as neutral” using the custom White Balance settings. Each camera is different, so once again you’ll need to consult your user manual on how to do custom white balance for your camera make and model.
But in all honesty, I rarely, if ever, use Custom White Balance. The preset options work well most times, with AWB as an alternative for mixed lighting or when the lighting conditions are changing frequently while you’re shooting.
#2 – When the lighting is constantly changing
If you’re shooting and the sun is coming in and out from behind clouds, AWB is a good choice. Or if you are moving around a lot and going back and forth from inside to outside, that’s another good time to use Auto White Balance.
#3 – Shooting JPG
Finally, if you are not shooting RAW files yet (more on that below) and are shooting only JPGs then I highly recommend putting it on Auto White Balance and not touching it until you start shooting raw format.
It is very difficult, if not impossible, to color correct JPG images shot at the wrong White Balance. Even the most experienced photo processors (myself included) can’t fix that mistake because the data information just isn’t there in the smaller JPG file.

So until you make the transition to RAW, put it on AWB and leave it there.
The benefit of shooting RAW
If you’re a regular reader of the website you’ll know that I use Lightroom and Luminar to process my images and I shoot RAW file format in camera. For more on why you’d want to shoot raw read: Why Shoot in Raw format.
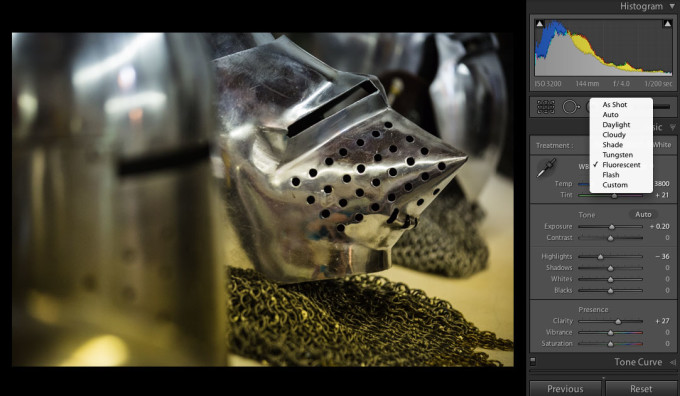
One of the huge benefits of shooting in RAW is that you can make adjustments to the White Balance in your image editor just like you can in-camera. Here’s a screenshot from inside Lightroom that shows the pull-down menu for White Balance options.
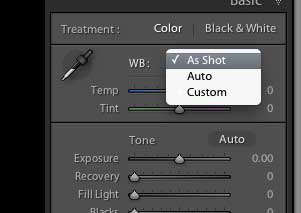
Compare that to the limited options you see using a JPG shown here. As I said before if you use the wrong White Balance and end up with a very off-color image it’s very hard to correct from a JPG. RAW – no problem, but if it’s JPG – just make it black and white!
Using White Balance creatively
So far we’ve just talked about making the White Balance correct or using it to neutralize any color cast due to lighting in the scene. But did you know you can also adjust your White Balance to change the look of your final images on purpose?
When might you want to do that? Let’s look at a few examples.
When shooting a sunrise or sunset
When shooting a sunrise or sunset you can add orange and make the colors more vibrant by using the Shade White Balance setting. In this scenario using AWB may be a disadvantage as well. If you remember the sunset being more vibrant and colorful, the AWB setting could be the culprit!


Winter scenes
Photographing snow or winter scenes to make it feel cold add blue by trying the Daylight or Tungsten setting. Which of the following pairs of images feels colder and more wintery?


Here’s another example of a winter scene with different color settings. Can you see how the color really affects the mood of the entire image?


When photographing people
Outdoors in the daytime using the Cloudy or Shade preset will give warmer skin tones and people will look a bit more tanned than using the Daylight option. I often use Cloudy for people photos even when I’m shooting in sunlight (which isn’t often).

Are you starting to get the idea? Once you know how your camera’s White Balance settings work and what they are doing, you can then use them to your creative advantage. Which of the following images looks and feels colder to you? Why?
Kelvin
There’s one more setting I mentioned earlier, the mysterious K option. Take another look at the Kelvin scale above. Now go into your camera White Balance settings and choose the K or Kelvin option if your camera has it.
This will give you the ability to dial in virtually any number on that scale and control the color anywhere along that range. Can you see now how that might be useful?
In the image below, I took it to extremes and pushed the colors way beyond what was actually there in the scene. I could push it over the top because it’s a sunset and the subject is silhouetted in darkness so even if the color isn’t correct you can’t tell, nor does it matter.

This is called creative license and you get the choice! The sky was just sort of drab and dull, so I added color when I shot it using the K White Balance option and added even more color using the adjustments to my raw file in Lightroom later.
Action Plan
I’d love to hear how you use White Balance creatively and share some of your images. Tell me in the comment area below if you learned something new and how you will apply it.
Do you feel more confident moving off Auto White Balance now?
Cheers,

well see it’s all subjective – “too blue” might work for one person and not for another. But you’re the creator so you get to decide on your images
Hello Darlene
Great article. Explains it is such simple terms. What do you think of the white balance lens caps that are on the market?
thanks
some are pretty decent – I almost never do custom though unless it’s mixed lighting. I adjust later in processing
Just wanted to let you know I’m still reading your articles and learning. I use AWB and shoot raw, but my D-7000 does a good job on AWB. I might tweak it sometimes to get what I want or help fix a mistake. Thanks Darlene.
Hi Darlene, I just wanted to let you know how much I enjoyed your article. I have to admit that when I first saw the title I immediately thought oh I already know all of that, but I’ll just give it a look anyways. I’m really glad I did, I learned how the camera applies the opposite temperature to compensate for the lighting that you are in. I also shoot in raw so it really doesn’t matter, but I am always curious about how things work and why. So thanks for the great article.
Mark
PS- the photo of the oil pumper is great.
sorry I missed these comments – thanks mark! I’m one that likes to know “how and why” so that’s how I write. Glad you enjoyed it.